 Kathy gave us a template for the little extra this week...and it was certainly a challenge!! I came up with this which I am not overly impressed with but it matches the template nicely :)...
I used freebie papers from Papercraft Essentials Mag, notecards that I 'borrowed' from Mum, Creative Impressions Ribbon and Photo Hanger, Papermania Eyelets and Photo Turn, Bazzill Brads, Prima Flowers and Printed the text in a circle using Beyond Wonderland font and Word....
How To Print Text in a Circle
(clicking the piccies makes them bigger :))
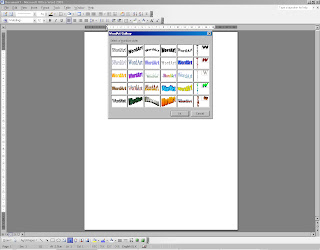
Open Word and click the insert Word Art symbol

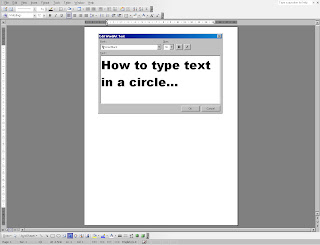
Click on the option that looks like and arch - on my Word it is the third on at the top and type the text you require

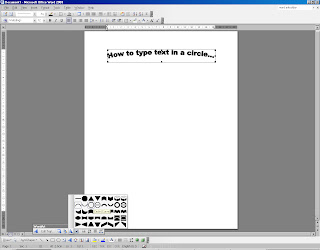
Click okay and the text will appear in the document. Click the Word Art shape symbol on the Word Art toolbar and choose the circle shape.

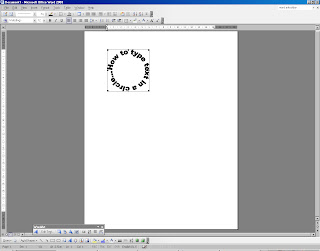
Text will appear squashed up - you can resize the shape by clicking format >> word art and then changing the size of the circle. By making the height and width identical, you will obtain a circle :)

HTH someone :)
jo xx


15 comments:
Love the card, thanks for the iformation about how to print in a circle.
Fantastic Jo...have had a play and printed lots of circle texts, thank you so much for sharing...great card by the way...I got some Cherry stickers as a freebie this morning so I may have to cardlift your Bowl of cherries idea;)
I love this card! Thanks for the inspiration :)
Hi Jo :)
Love that card - spotted the cherry paper as soon as I saw it!! Am dying to have a go with it too (when I get home to my crafting space!)... Think you've made a fab card with it!
Dying to hear your crafty news soon - go on, do tell lol!!!!
Patsy x
Great card Jo - and thanks for the lesson - I was looking at your card earlier and thinking "I wish I could do that" then pop on here and find your lesson. What a result
well, i think it's a GREAT card...i don't know if i could've got my head around the waves and made something that cool!!! :)
Fab card as always Jo. And thank you for the tutorial!
Lovely card, the cherry paper is cute! Thanks for the info on printing text in a circle, I never knew how to do this before - now I do!
Thanks for that - really clear instructions - and I love your card too.
Thanks for sharing this! I never knew about all the shapes for wordart!
Love this idea and thanks for letting me know how it is done!
love na
Lovely card. Your news sounds exciting - looking forward to hearing what it is. Thanks for your comment left on our Salt blog.
OMG, I can't tell you how long I have been trying to achieve getting text into a circle shape, thank you so much for the user guide, your a genius.
Hi Jo,
Yippeee!!!! Been trying to do this for ages. Thanks sooo much for the circle font guide.
Mich
xx
Thanks so much Jo for taking the time to show how to do this ,i would have never been able to do it other wise ,Dawnxx
Post a Comment