A little pushed for time this week, Jared is sleeping a little better but it is taking a while for me to catch up. I made the huge leap to Blogger Beta as I could no longer comment on all your wonderful blogs (was slightly annoyed at kinda having to do it Tsk!) I apologise for the lack of comments, all should be fixed now :) (and I have sorted (I think) the also annoying problem of everyone's comments here appearing as anon.)...
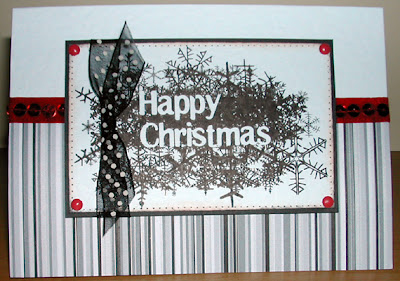
I made a predominantly printed card this week, for ease...

Ribbon is from M&S (from the outlet store wouldn't pay full price for it:)) and Little Silver Hat, and brads are from the stash that happily plopped on to my doormat earlier this week!
and.... here's how you make a cool background...
*I know that I am not the first person in the whole world planet (as Josh would say!) to make a background using word but this is my way of doing it :)*
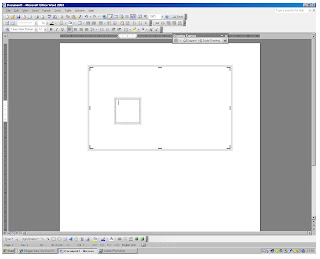
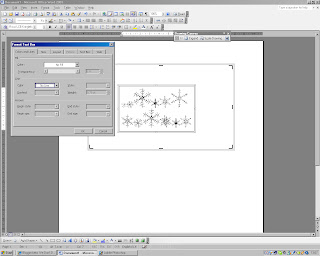
Don't forget that if you click on the piccies, they become readable!
Open word and choose insert - text box

Type lots of snowflakes into the box in differing sizes- don't forget that you can manually change the size if you want super huge ones.
I used Risus LCB Kringlebats
Click on format - Text Box and choose no line and no fill for the box.

Make lots and lots of other boxes in the same way.... and drag them over the top of one another *top tip* if you make some of them bold then the middle gets dark very quickly (which is a good thing!)
Once you have lots and lots of boxes , type Happy Christmas (or any other sentiment that you choose!) and change the font to white. Again, select no line and no fill from the format - text box menu and drag this box over the darkest area. nb the photo only shows pink to help you lol (and I like pink!)
Et Voila! You can use this with words, other dingbats pretty much anything that you can type to make groovy backgrounds - ok so it is a little time consuming, but once you have it done and saved, tis easy to print, trim, ink, stitch, doodle...... onto :)
and that is that! Big hugs to Debbie who has suspended her Card Making for the time being.{{{{{HUGS}}}}} Debs has been a fantastic 'Darer' and I will miss you.
Don't forget to check out the blog for all the other Black and White with a splash of colour cards. 'They are all amazing cards this week (as they are every week!) and don't forget to show us your fantastic creations :)

7 comments:
Wowzer - thanks for that - and what a cool way to be able to do white lettering
Fab tutorial Jo, thanks for sharing how you made your fab card :D
Rhi x
Now if you could just put that in your book too, that would be great!!! LOL...
Oh wow.. thanks for the lesson... you are sooooooo clever.. never knew how to do that.. Will give it a go soon.
I really love this card.. it's gorgeous... great design.
Thanks for sharing!! is very nice!!
Bety.
thank you for sharing that, I love white writing. I too had to leap to beta after blogger deliberated pushed me by refusing comments on others. It all seems okay but I daren't alter my template for fear of losing the lot!!!!!
haha I'm with Paula on that last sentence of her blog comment ! YEs ! thanks much for the lesson, Jo ! what a great idea when one doesnt quite hve the right supply on hand !
Great card Jo, i would never have known you made it that way without the instructions well done.
Andrea xx
Post a Comment